Showing posts with label tilt and shift. Show all posts

Monday, 21 April 2014

Tilt and shift + lens buying tips

About a year and a half ago, I purchased a Canon TS-E 24mm f3.5 lens. A so called tilt and shift lens.

I bought it (second hand and in excellent condition) because I'd been shooting previously with a Sinar and a Rollei SL66 in the studio, which both have T&S capabilities and I wanted to be able to replicate the effect with my DSLR without resorting to computer trickery  .

  Sinar in the studio with the movements showing

Unfortunately my use of the lens was confined to testing it quickly in a car park when I met the guy who was selling it. We both lived far away from each other and agreed on a point midway where I could quickly test the lens before handing over the money.   

My method for testing a lens is this. 

  • I give the lens a visual inspection. I look for dust, dirt scratches etc on the lens. There were none.
  • Then I attached it to my camera and made a series of shots of the same subject in unchanging light using aperture priority. I shot at every aperture from f3.5 (wide open) to f22 (fully stopped down). I then scroll through the previews pictures on the screen. They should all be uniformly exposed. If one isn't then there is the chance that the aperture blades are not functioning properly. 
  • Next test is the shoot at different distances and check (with the help of the screen again) if the pics are sharp.
  • The last test is only done if the lens is an autofocus type (this particular lens is manual focus). I shoot a series of images of the seller walking towards me to try out the servo focussing. It also gives me a pic of the seller, should there be any "difficulties" later  :)
The lens passed all the tests and I gladly handed the money over. When i got home I put the lens in my equipment drawer and promised to use it on my next job . . 

Fast forward eighteen months later and I was wondering what to take pictures of on my free Sunday. I remembered the lens which was still sitting unused in my drawer. 

There's a beautiful mustard rape field about six minutes away from my house which is backed by part of the Jura mountain range. I decided to take a pic of this using the lens to get only the trees in focus.


I set the camera up on my trusty Benbo tripod and made sure that everything was level


This is NOT level

 The lens can also be rotated to use in vertical format 
 whilst still able to make use of all the movements.

After making a few test shots, I tilted the camera upwards and the lens downwards to give me the minimum amount of depth of field and I focussed using the live view mode to ensure that the trees were sharp. I ten took the picture (using self timer) at the minimum aperture.
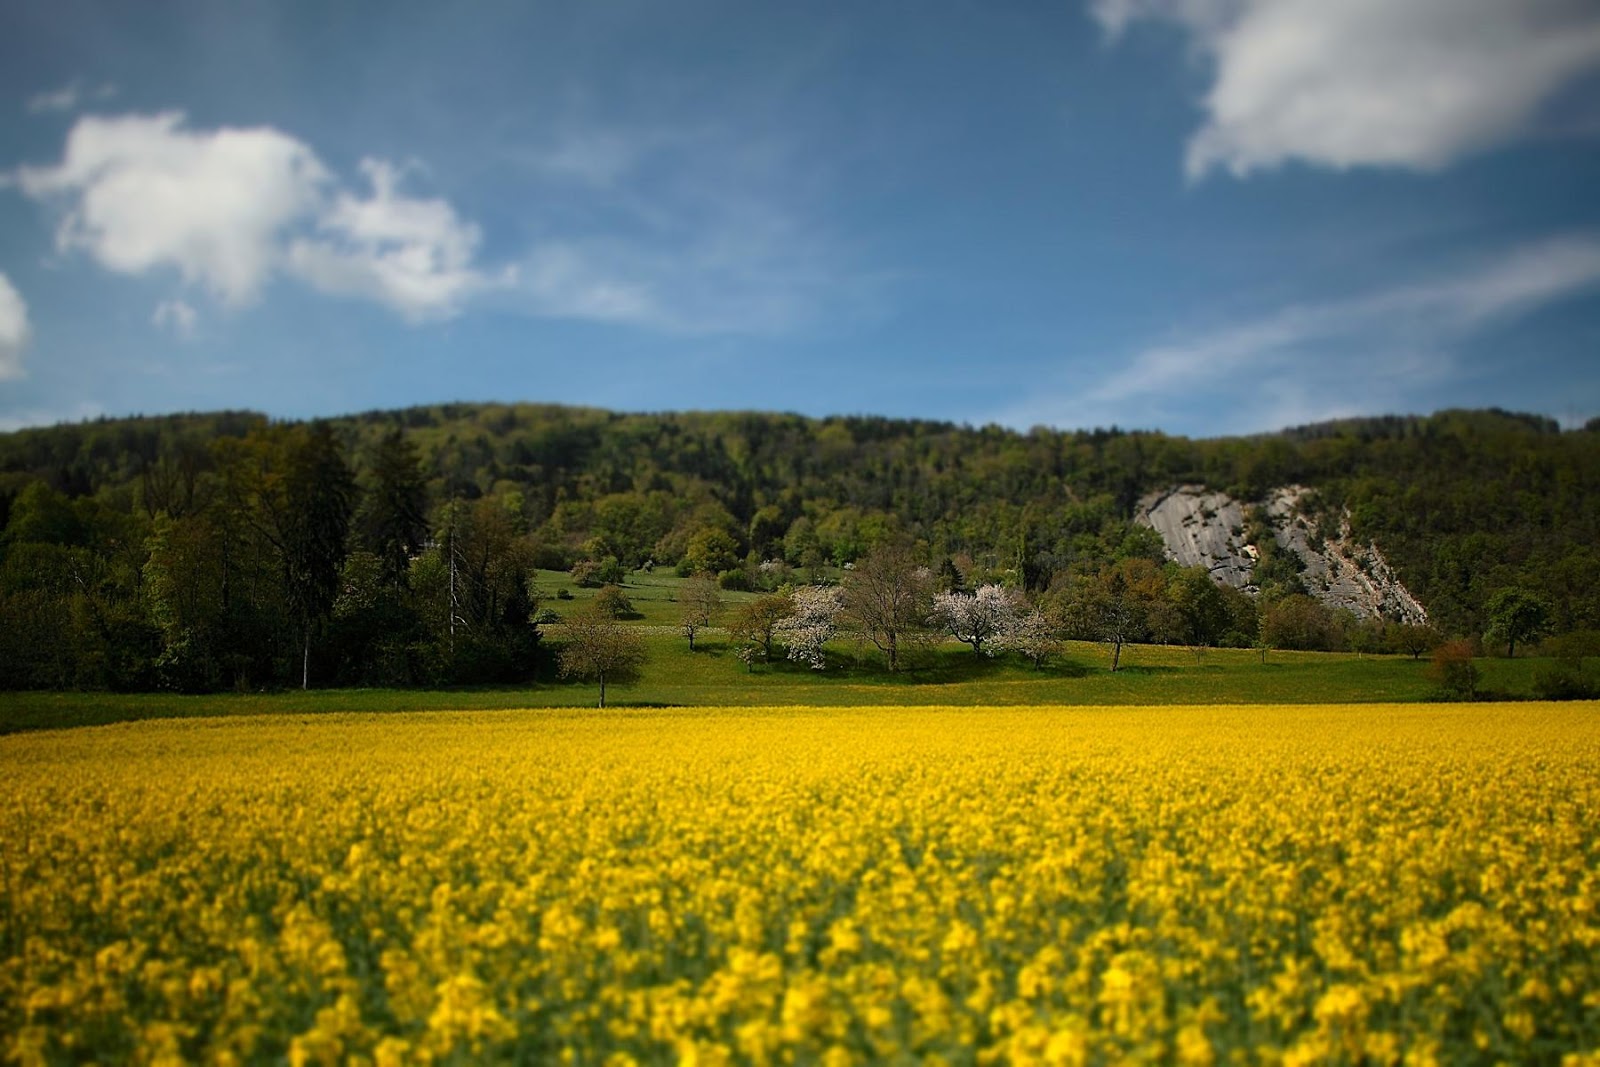
Mustard rape. 1/3200sec @ f3.5 ISO 200
This pic is best viewed at full screen

 
I processed the RAW file in DPP and can honestly say that I'm pleased with the result. Unfortunately, there were no profiles for this particular lens so I used on instead for the 24mm f1.8 model.

I love playing with this particular piece of kit as it makes me stop and think about what I'm tying to achieve. Focus is manual and very precise. The live screen mode is recommended to be able to see what is happening. A good tripod is a must.

One person approached me whilst I was taking these images and informed me that the latest version of the lens is much better. I answered that just because Canon had replaced it didn't mean that it had suddenly gotten worse overnight!

There's a wonderful article by Keith Cooper over on the Northlight Images website about what exactly you can achieve with a T&S lens 

I'll be using it next month for an interior shoot that I have planned.

Thanks for reading.

Tuesday, 6 August 2013

There probably isn't an App for this. Yet!


If I'm feeling lazy and want to reproduce a tilt shift effect on an image with my mobile phone, I can use the Snapseed App. If I want a faux HDR effect, there's an App for that as well.

However, there's one effect that I haven't yet found an App for. Can you guess what it is? The answer is . . wait for it . . polarisation.

That's right. the humble (if somewhat expensive) polariser filter. 

I've always had polarisers in my equipment collection. They are a great accessory and if looked after correctly, will last as long as, if not longer than, your camera gear.

So, what does this marvellous piece of glass do?

To put it briefly, it removes reflections from non metallic surfaces and intensifies colours. But, there is a caveat. The effect will be most effective when used at right angles to the sun. This means that if you are using it to remove glare from a shop window, then don't stand full on to the window. 

The polariser has two rings. One has the filter thread and remains fixed on the lens while the other rotates. The effect of this rotation is visible when looking at a live image through the viewfinder. You notice the effect, whether it's reflections disappearing, blue skies getting more intense or colours intensifying as you turn the ring.

Here are a few examples that I took a couple of weeks back. This was a spur of the moment thing so I didn't have a tripod with me to produce exactly the same field of view in each image. I had to first take the picture, then screw the filter on and rotate it for the best effect and then take the next picture.

I saw this interesting shop window in the town of Wangen an der Aare. It was a very sunny day (ideal for polarisers) but there were lots of reflections. Standing at a right angle to the window I rotated the front filter ring whilst observing it through the viewfinder. When I saw that it had removed most of the glare, I took a picture.


 Before and after

One thing to note, when using the polariser is that it cuts down on the light reaching the film / sensor. to counter this, you can either increase the ISO or use a tripod if you think that the exposure will be too slow.

Then it was down to the river where I wanted to demonstrate the water reflection killing capabilities of the polariser.


Again, a before and after shot showing how the slightly washed out sky plus the grass colours in the first shot have been strengthened in the second one along with lots of the water reflections being eliminated.


 As if more proof were needed. Here is my favourite example shot from that day. Just look at how much more intense and clear the water is in the second photo when compared with the un-polarised first picture

Another word of warning. As I mentioned earlier, the filter consists of two rings. If you are using one on a very wide lens, you may experience vignetting where the filter is visible in the corners of the image (i.e.dark corners). To combat this, take off any other filters already on the lens or buy one of the newer generation of slim filters.

Thanks for reading. Please feel free to leave any comments or even ask a question or two!