Showing posts with label Canon. Show all posts

Sunday, 8 January 2023

Real Estate Photography

The bulk of my work nowadays is real estate photography. As mentioned elsewhere, I enjoy photographing and looking at beautiful examples thereof.

It's almost always a pleasure therefore, to get a commission to photograph interiors for houses or apartments that are going on the market. 

The majority of my commission jobs originate from an international startup company which hires photographers near to where the properties are. Occasionally I also get assignments well outside my area because maybe there are no local photographers available.

My assignments are generally booked for one hour. Sometimes, in the case of a particulary luxurious subject, I'll get two hours.

These are my observations.

The Gear

I carry the bare minimum of gear with me. Important here is a good wide-angle lens. On my Canon full frame body, I'll use the excellent Canon EF 16-35mm f/4.0L IS USM at the widest focal length. On my Fuji body I will use the equally fine Fujinon XF10-24mm F4 R OIS WR, also at the wide end.

Using the wide end of the lenses creates an illusion of more spaciousness than actually exists. I always set the lens for every image at F11 or F13.


Wideangle lenses create a false sense of roominess

Due to time constraints, I don't take any extra lighting units or stands, so to balance the (sometimes) dark interiors with (often) bright exteriors, I shoot three exposures in quick succession while the camera is mounted on a tripod. These are shot at normal (metered) exposure and then again at minus two stops and again and plus two stops.


 Three exposures


The resulting exposures are then fed into an HDR editing programme which merges all three images. The HDR programme takes the shadow details visible in the overexposed image, the highlight details visible in the underexposed image together with the midtones from the normally exposed imge and blends them together.


The final result is well exposed
 

For my own HDR processing, I use the excellent Photomatix Pro programme which gives a range of finished templates or you have the option to finetune the resuts yourself. The programme currently costs $99 for the watermark free version.

There is however a wonderful and fully featured free alternative called Picturenaut. I wish I'd known about this before I bought my copy several years ago!

What to look out for

Remember. Your job as the photographer is to present the property in an as appealing way as possible. There is a story that the smell of freshly brewing coffee can help swing the sale of a property when prospective clients are onsite. However, well exposed and organised images can help in a virtual sense. 

With that in mind, I make sure that the place looks tidy (if the house is still occupied). Remove any ashtrays and dog/cat baskets visible. Clean windows look a lot better than dusty smeared ones. Normally the house owner or real estate representative will make sure that everything looks good. I don't normally have time to do both cleaning and photography without charging extra.

Some photographers don't like personal items such as family portraits and framed family pictures on display. My reasoning is that they make the house look more like a home and "lived in" instead of a sterile "home and garden" magazine type image. Any personal pictures that appear in any shots are blurred to avoid recognition.


Family pics on this extractor fan give a family "feel".
 

What could possibly go wrong?

Check your gear thoroughly before setting off. If possible take an extra body or extra wide angle lens. Make sure that the front element of your lens is squeaky clean as you will often be shooting into the light which will immediately highlight any greasy fingermarks or blemishes.

Make sure also that your sensor is clean. Any dust spots will show themselves against a blue sky or lightly coloured walls.

Although I don't like the process of "chimping*" (checking each image on the monitor after each shot), it is a must when doing interiors because sometimes the focus is not absolutely spot on. Better to correct it onsite than travel back to base to discover that the image isn't ultra sharp.

Next up are verticals and horizontals. I use the camera's built in electronic level to ensure that the camera is absolutely perpedicular and not tilted etc. This also saves time later in post processing.

Keep the camera vertically and horizontally perfect.

Another thing to consider is that toilet seats should be down. It looks more aesthetically pleasing.


To give a good impression when visiting I also put cloth covers over my shoes to protect the flooring and carpets in the client's home. These are very inexpensive and can be bought online.

Cloth shoe covers

Conclusion

These are the methods that I employ when photographing interiors. They serve me well and I tend not to deviate from them. That's why I can photograph a property in one hour (forty minutes if empty) which is convenient for the home owner and enables me to get to the next one quicker. 

Here are a few of my recent examples.


I hope you enjoyed reading this article and can maybe consider using the info when you next have to shoot interiors. As ever, if you have any queries, please feel free to contact me.


Tom


*Chimping is a colloquial term used in digital photography to describe the habit of checking every photo on the camera display (LCD) immediately after capture.


Wednesday, 30 March 2016

A shoot shooting shooting stuff!

An interesting opportunity recently presented itself.


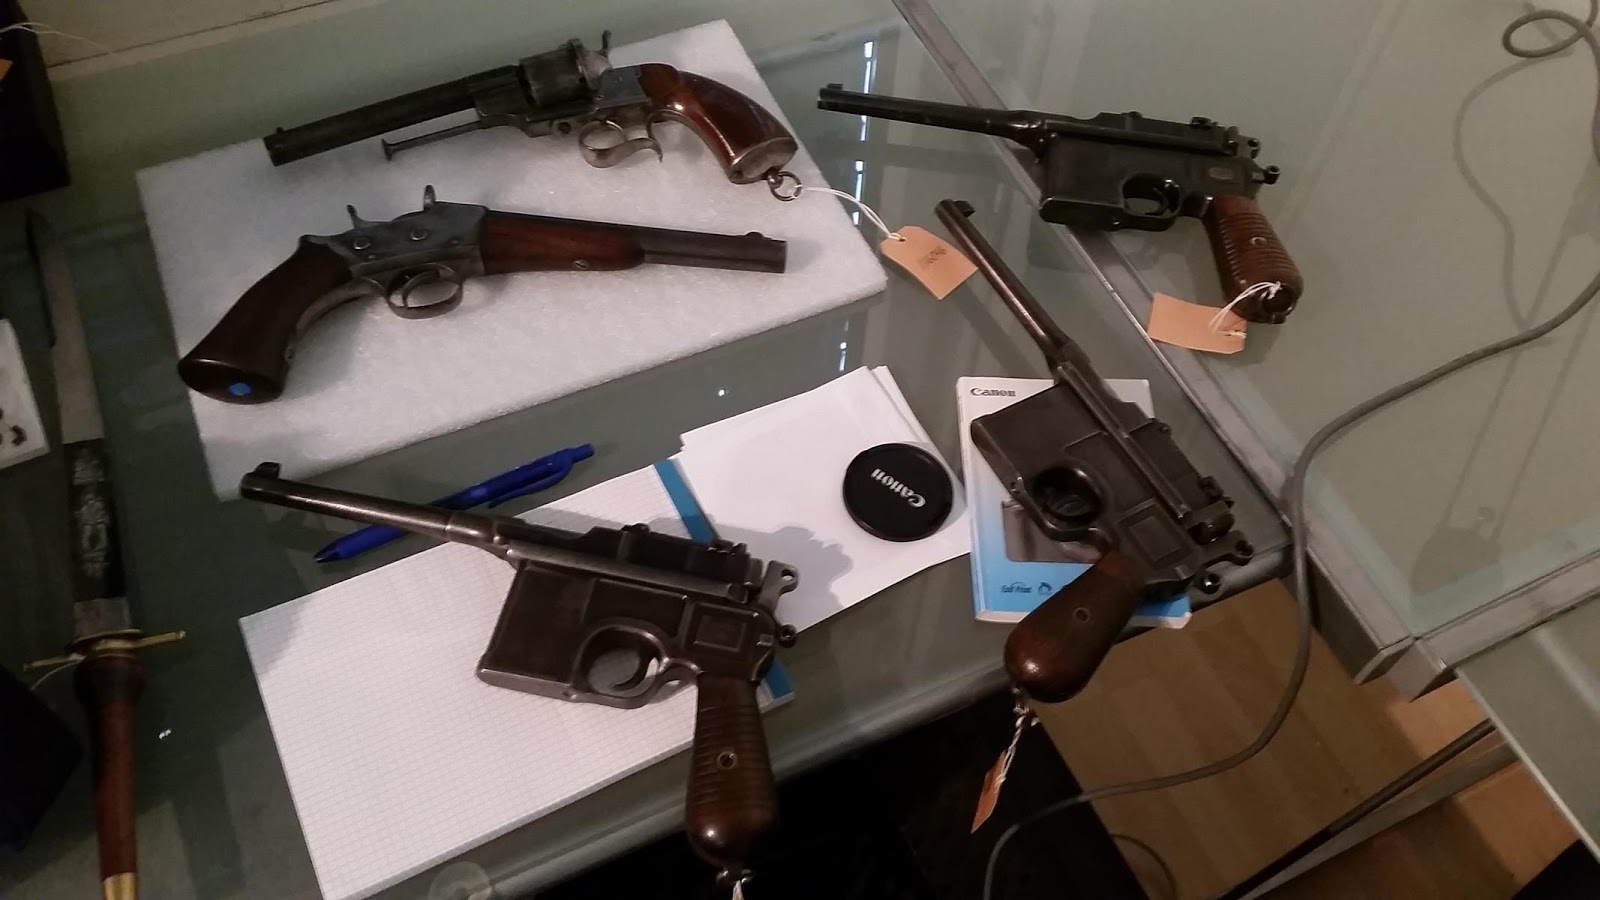
A friend of mine who has a gun dealership asked my advice on taking product shots for a catalogue to be used at one of his upcoming auctions.

   Some of the 600 or so weapons to be photographed and auctioned.

He had photographed previous auctions using a small point and shoot compact but was dismayed at the inconsistency of the results.

I discovered that he had an old Canon EOS 400d and we decided to use that for the shoot together with its 18-55 f3.5 - 5.6II kit lens. however, he was so enamoured of my demonstration of the EOS Utility programme (which comes with all canon raw capable cameras) where the camera can be tethered to a computer, that he went out and bought an EOS 70d.

My plan when doing product photography is always as follows:

1:     If the products are on a wall or lying flat on a table, make sure that the camera is perpendicular to the subject. I use a simple spirit level on the subject and on the camera. At first I was using a small spirit level on the back of the 70d until I read the instruction manual during a coffee break that it had a built in electronic level! 

Before discovering the electronic level!

2:     Make sure that the basic lighting is consistent if you are looking for even illumination. That means take a light meter reading from different parts of the area to be photographed to make sure that there are no darker or lighter areas that your eyes might not register. For this shoot, my friend was using constant lighting so we could gauge visually where any inconsistencies might be.

3:     When you have determined the correct exposure, use that for the whole shoot as long as the light is consistent.

Quick, simple and effective

4:     Close the windows and draw the curtains (or blinds). If daylight is streaming into the room, it will show on the images as it gets progressively stronger and weaker throughout the day. the only light hitting your subject should be the stuff that YOU are supplying.

5:     Use a "standard" lens. This is a lens that equates roughly to the same angle of view that your eyes see (46 degrees). With a full frame camera this is the so called nifty fifty.With a Canon APS sensor camera it would be a 30mm. I use this so that no distortion is introduced into the image.

6:     Start with the biggest items first. As the items get smaller, you move the camera nearer. You DON'T zoom in!. If the lighting is consistent, you won't have to change anything except the focus as you are moving nearer.

Once you have observed and used the above methods, you will find that it goes really fast. in our case, my friend had one person taking out the weapons, another laying them down, another taking a picture using the infra-red release (to keep camera shake to a minimum.) and a fourth person cataloguing everything as it was shot.

 Workflow

Don't forget to take a few safety precautions. As our camera was balanced precariously at the end of a tripod extension arm, we used a carrier bag of ammunition to counter it!


 Who needs expensive ballast bags?


Tripping over cables should 
also be avoided.


 Guns everywhere

 Here are a few "behind the scenes" images taken during the shoot.


Thanks to an organised and motivated team, we were able to churn our way through nearly 600 rifles, pistols, machine guns, grenades, muskets, flintlocks, rocket launchers (yes really) and assorted paraphernalia in two and a half days.

Here are a couple of the first results.


The auction which will be available internationally will be held here in Switzerland at the end of April. You can get a catalogue and find out more by visiting the Swiss Tactical Center website.

I hope you enjoyed reading this. If you have any comments, please leave them in the box below.

Tom


Friday, 23 January 2015

A couple session

I received a message last week from a model friend with whom I had lost contact with. Steffi had moved away from the area but was now back in my neighbourhood and made contact with me.

We talked a while and it was suggested that I take some updated photos for her portfolio. I was happy to do so and duly turned up at their house a day or so later. 

It was freezing cold and very overcast outside but thankfully her and her partner's apartment was lovely and warm. After a meal we set to work.

Because it was quite dark with the room lighting, I decided to use my Lightsphere Chinese clone to soften the flash. I attached it to my Speedlite 430 EX II and fired away. I really enjoy using my Lightsphere clone. The effect it has on the flash output is quite dramatic and turns what would normally be harsh shadows into soft pleasing romantic light.      


My Lightsphere copy on the table and at work

After moving some tables and chairs to make some space, we began the shoot.


The images above were all taken with the 24 - 105 using flash and the lightsphere clone. The ISO was 400.

After the sitting room, we went to the bedroom to get some photos of Steffi and her partner Marc as a couple. I wanted a light airy "feel" to the images so I mounted my two Speedlites on tripods and bounced them off the ceiling. The flash output was set to overexpose by one stop. To add to the "light and airy" mood, we took the duvet covers off. To trigger them, I used Phottix Odin transmitter and receivers. The Phottix Odins are simply fantastic to use and haven't ever let me down. They are way cheaper than Pocket Wizards and are more versatile.


I told Steffi and Marc to ignore me and just interact with each other. Their two cats joining us from time to time, helped produce some very pleasing images.


 One of the few images without flash


All the images above were taken with the 50 1.4.

Marc was also kind enough to take some images of me "at work".


Although, as usual, I took too much gear with me, I ended up only using my EOS 5D MKII, the 24 - 105 zoom and the 50mm 1.4. Still. It's better to take too much gear and not need it than to take just a few items and find that you miss something. 

Steffi is a real professional and a pleasure to work with. Nothing is too much trouble for her. If you'd like to see her online portfolio, you can use this link (German).

That's it for now. Thanks for reading and please feel free to leave some comments below.