Showing posts with label tom waugh. Show all posts

Sunday, 8 January 2023

Real Estate Photography

The bulk of my work nowadays is real estate photography. As mentioned elsewhere, I enjoy photographing and looking at beautiful examples thereof.

It's almost always a pleasure therefore, to get a commission to photograph interiors for houses or apartments that are going on the market. 

The majority of my commission jobs originate from an international startup company which hires photographers near to where the properties are. Occasionally I also get assignments well outside my area because maybe there are no local photographers available.

My assignments are generally booked for one hour. Sometimes, in the case of a particulary luxurious subject, I'll get two hours.

These are my observations.

The Gear

I carry the bare minimum of gear with me. Important here is a good wide-angle lens. On my Canon full frame body, I'll use the excellent Canon EF 16-35mm f/4.0L IS USM at the widest focal length. On my Fuji body I will use the equally fine Fujinon XF10-24mm F4 R OIS WR, also at the wide end.

Using the wide end of the lenses creates an illusion of more spaciousness than actually exists. I always set the lens for every image at F11 or F13.


Wideangle lenses create a false sense of roominess

Due to time constraints, I don't take any extra lighting units or stands, so to balance the (sometimes) dark interiors with (often) bright exteriors, I shoot three exposures in quick succession while the camera is mounted on a tripod. These are shot at normal (metered) exposure and then again at minus two stops and again and plus two stops.


 Three exposures


The resulting exposures are then fed into an HDR editing programme which merges all three images. The HDR programme takes the shadow details visible in the overexposed image, the highlight details visible in the underexposed image together with the midtones from the normally exposed imge and blends them together.


The final result is well exposed
 

For my own HDR processing, I use the excellent Photomatix Pro programme which gives a range of finished templates or you have the option to finetune the resuts yourself. The programme currently costs $99 for the watermark free version.

There is however a wonderful and fully featured free alternative called Picturenaut. I wish I'd known about this before I bought my copy several years ago!

What to look out for

Remember. Your job as the photographer is to present the property in an as appealing way as possible. There is a story that the smell of freshly brewing coffee can help swing the sale of a property when prospective clients are onsite. However, well exposed and organised images can help in a virtual sense. 

With that in mind, I make sure that the place looks tidy (if the house is still occupied). Remove any ashtrays and dog/cat baskets visible. Clean windows look a lot better than dusty smeared ones. Normally the house owner or real estate representative will make sure that everything looks good. I don't normally have time to do both cleaning and photography without charging extra.

Some photographers don't like personal items such as family portraits and framed family pictures on display. My reasoning is that they make the house look more like a home and "lived in" instead of a sterile "home and garden" magazine type image. Any personal pictures that appear in any shots are blurred to avoid recognition.


Family pics on this extractor fan give a family "feel".
 

What could possibly go wrong?

Check your gear thoroughly before setting off. If possible take an extra body or extra wide angle lens. Make sure that the front element of your lens is squeaky clean as you will often be shooting into the light which will immediately highlight any greasy fingermarks or blemishes.

Make sure also that your sensor is clean. Any dust spots will show themselves against a blue sky or lightly coloured walls.

Although I don't like the process of "chimping*" (checking each image on the monitor after each shot), it is a must when doing interiors because sometimes the focus is not absolutely spot on. Better to correct it onsite than travel back to base to discover that the image isn't ultra sharp.

Next up are verticals and horizontals. I use the camera's built in electronic level to ensure that the camera is absolutely perpedicular and not tilted etc. This also saves time later in post processing.

Keep the camera vertically and horizontally perfect.

Another thing to consider is that toilet seats should be down. It looks more aesthetically pleasing.


To give a good impression when visiting I also put cloth covers over my shoes to protect the flooring and carpets in the client's home. These are very inexpensive and can be bought online.

Cloth shoe covers

Conclusion

These are the methods that I employ when photographing interiors. They serve me well and I tend not to deviate from them. That's why I can photograph a property in one hour (forty minutes if empty) which is convenient for the home owner and enables me to get to the next one quicker. 

Here are a few of my recent examples.


I hope you enjoyed reading this article and can maybe consider using the info when you next have to shoot interiors. As ever, if you have any queries, please feel free to contact me.


Tom


*Chimping is a colloquial term used in digital photography to describe the habit of checking every photo on the camera display (LCD) immediately after capture.


Sunday, 29 November 2020

The Four Seasons

This is not a blog post about Vivaldi's seminal work

Some years ago when living in my previous apartment, I photographed the same view from my kitchen window during the four seasons, Spring, Summer, Autumn and winter.

At the end of the year, I combined them into one image using my image editing programme. It was purely a personal project and the people I showed seemed to like it.

My 1st attempt. View from the kitchen window

After a two year break from thinking about it, I decided to do another. This time with an historical angle.

I am lucky to be living in a beautiful area that has several castles, forests and ruins all within a short distance from my apartment. This was important because I couldn't guarantee that the weather would be the same as I wanted when arriving there. 

My partner and I visited several places over a period of weeks before deciding on a view halfway between my place and the town of Balsthal. There is a parking spot which affords a spectacular view of the ruins of Castle Neu Falkenstein.

My rules for the four seasons project are pretty much the same as for when I am documenting progress on building sites. I wrote about it here.

We picked a good vantage point and my partner , Sue, took pictures of where I was standing and which fence post I would be standing beside as an "aide de memoire" for later.


My location. Google Streetview image


 My viewpoint. Picture by Sue.


The exact fence post!😀

I took the first picture this year (2020) in February. We had a light sprinking of snow and I didn't know if there would be another* 


February 2020

After choosing a viewpoint, it is also of course important to use the same camera and lens setup for every picture. I settled on my Fujifilm XE-2s coupled with the 18-55 zoom, always set at 55mm. The focus point chosen was always the middle one and I had the "level indicator" always visible in the viewfinder in order to keep the camera level. Doing all this helps the final editing to go a lot smoother.

Guidelines showing the center of the image

The following images were taken using the methods and equipment desribed above in April, July and October.

April. Spring

 July. Summer


October. Autumn

After the final picture was taken, it was a simple job to create a new document in Affinity Photo with a layer for each season. I then divided the image into four and erased any bits that didn't belong. This is the final result.


I am rather pleased with the end result and am currnetly looking for my next location(s).

This is a simple and very pleasurable photo project that gets you out of the house and exploring new (or familiar) places. It is interesting to view the changes over the course of a year. Of course, your final image doesn't have to be in the style that I did. You could display them separately or have all four in a frame.

Whatever you do, have fun and be safe.

Tom


 *There hasn't been yet.(November 2020)

Sunday, 20 May 2018

New tech. New ideas and building site progress photography

I currently have an ongoing project.

Since April 2017, I have traveled every two weeks to a building site, ten minutes from where I live, to document the progress of the construction. 

Using the architects own plans, I was able to see the best vantage points to show the progress in the best way. I was delighted when a couple who live in an apartment overlooking the site offered to let me use their balcony whenever I am there. 

On my very first visit, I took many general photos. Back home, I produced JPG's and superimposed my Canon 5d MKII's focusing points over the image. I transferred these images to my Samsung tablet so that when I am onsite, I can see exactly where my camera should be pointing.


My reason for taking as many images as possible on my first visit is because I have learned from past experience that eventually, there will be objects such as walls etc which will block your view or even pop up where you originally were standing!

My other "constant" is the lens and body combination. I use a 5d MKII fitted with an EF 16-35mm zoom. All the images I make are taken at the wide end. With this method, I can ensure uniformity in my results.

"So where are the new ideas mentioned in the headline"? I hear you ask. Last year I won a Samsung Gear 360 camera in an online competition. This is a golf ball sized device that has a lens on the front and on the back.

The two lenses' f.o.v* overlap with each other and some clever software stitches them together. This results in 360 degree images or videos that you can view and move around in, on your PC or smartphone.


The Samsung gear 360 camera

And here are some of the resulting images.

You can see more of my 360 images on the wonderful Kuula website.

The Samsung gear 360 is compatible with the Galaxy S7 edge, Galaxy S7, Galaxy Note5, Galaxy S6 edge+ and Galaxy S6 smart devices. You can however use it without a smartphone.

Every six months, I put together a series of still images to make a "stop motion" type movie using the free and very capable Microsoft Movie Maker programme. Here is the latest version.


That's the beauty of photography. There's always something new and exciting to discover. Whether it's a new camera or lens or even just a reworking of an old technique. Our hobby / Passion is always well fed.

Thanks for reading.


*f.o.v field of view


Friday, 16 February 2018

Maps, books, cities and churches

I've been doing this photography lark since 1979. My first image was printed in a newspaper for US soldiers based in (then) West Germany around 1980. I was thrilled to see my image of tanks driving through a gate and bought several copies of the newspaper.

The feeling has never gone away. True, the internet allows us all to see our work published but nothing in my opinion beats having my images featured on paper.

Last year I was contacted by Jasper van Puten, a lecturer at  the Massachusetts School of Art and Design. He had seen an image of mine on Google Earth that would help to illustrate a part of a book he was in the process of writing "Networked Nation: Mapping German Cities in Sebastian Munster's 'Cosmographia' (Maps, Spaces, Cultures)".

Here's the blurb about the book. "Jasper van Putten examines the groundbreaking woodcut city views in the German humanist Sebastian Münster’s Cosmographia. This description of the world, published in Basel from 1544 to 1628, glorified the Holy Roman Empire of the German Nation and engendered the city book genre. Van Putten argues that Münster’s network of city view makers and contributors—from German princes and artists to Swiss woodcutters, draftsmen, and printers—expressed their local and national cultural identities in the views. The Cosmographia, and the city books it inspired, offer insights into the development of German and Swiss identity from 1550 to Switzerland’s independence from the empire in 1648.* "

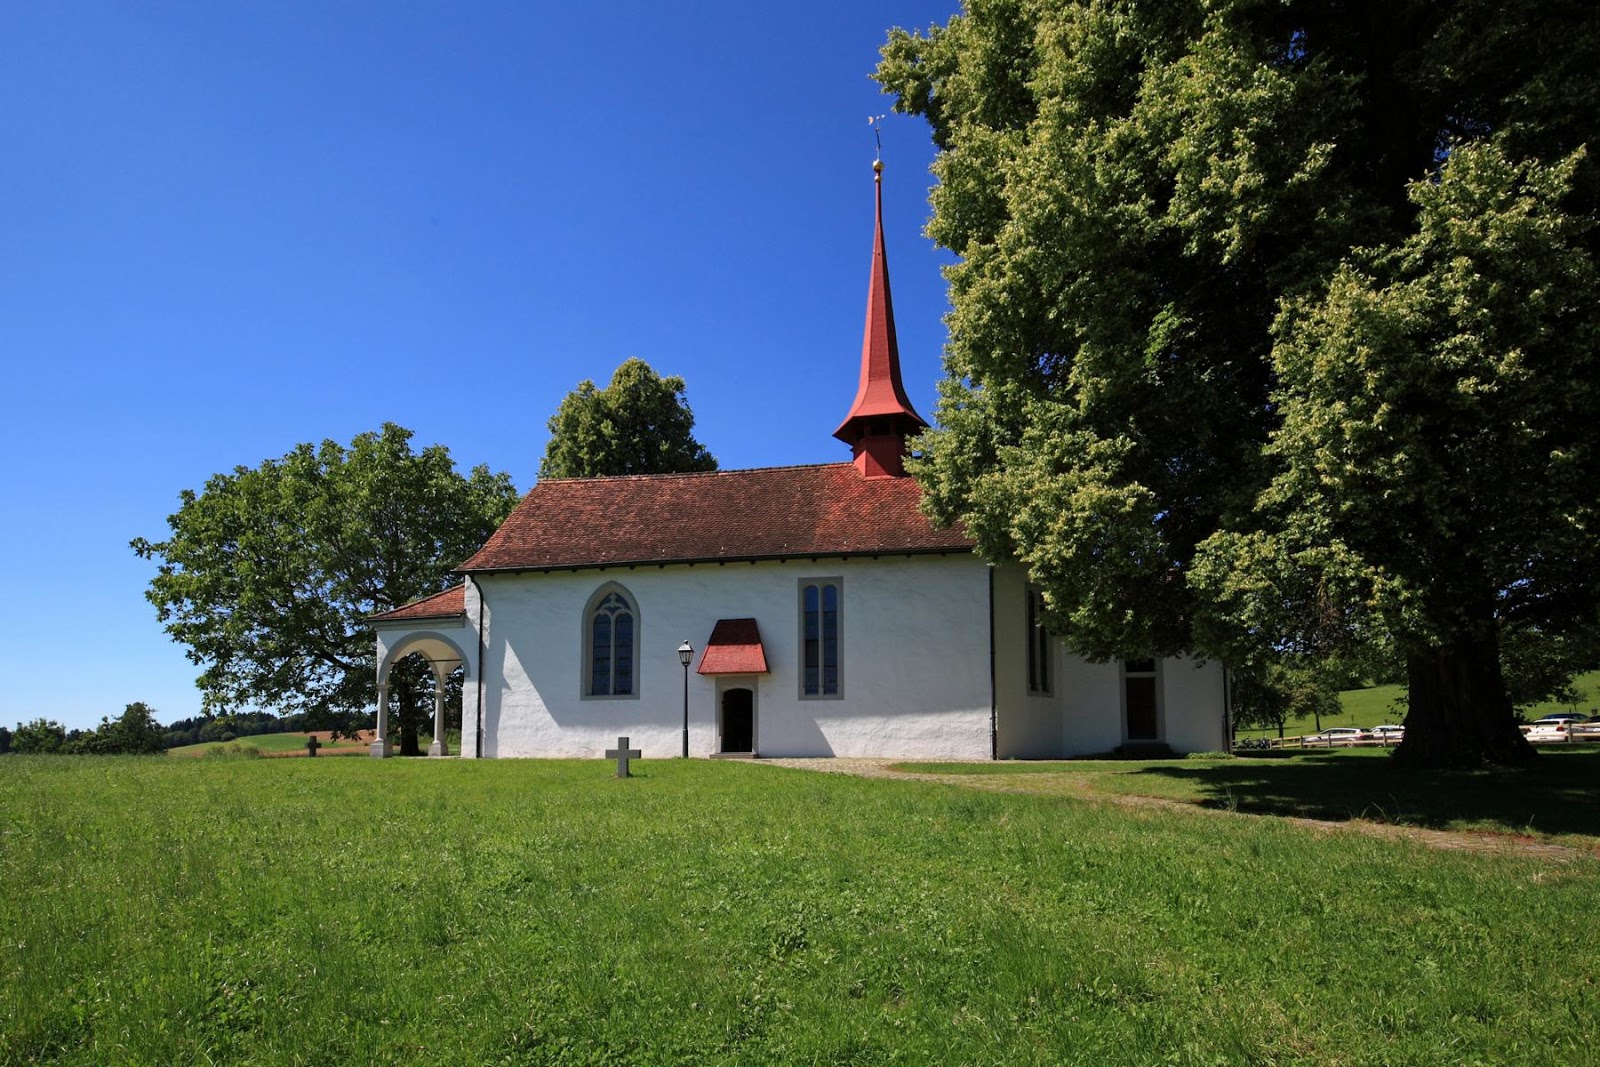
My image was to be used in the Swiss identity section of the book and was taken at the Sempacher "Schlachtkapelle" (Sempach Battlefield chapel). The chapel is built on the site of the battle of Sempach which took place in 1386 and was decisive in helping Switzerland win independence from the mighty Austrian Habsburg empire. Jasper was interested in using my image of the mural in that chapel which depicts the battle.

Aside from photography, I also enjoy studying and collecting old maps and engravings, so I was over the moon at having one of my images considered for inclusion in the book. We agreed a reproduction fee and several weeks later I received a mock up of how my image would appear in the book.


Here's the image in more detail:

Canon 5d MKII 16-35 zoom. ISO 640 1/40 at f4.5

The book is now in print and at the time of writing, only one copy is still available on Amazon.

As for the chapel itself, it is a place I love to visit with my camera. One of its features is that it has an ossuary (beinhaus in German). A repository of bones to commemorate the dead. Ossuaries are a pet project of mine and I have some of my ossuary images here for you to see on Google Plus.

For a more immersive experience, you can see the chapel interior in full 360 degrees courtesy of my 360 degree image of the chapel interior.

Here are a few more images of the fascinating place.

  Canon 5d MKII 16-35 zoom. ISO 200 1/200 at f13

  Canon 5d MKII 16-35 zoom. ISO 200 HDR Tonemapped image

 Canon 5d MKII 16-35 zoom. ISO 200 HDR Tonemapped image

Canon 5d MKII 16-35 zoom. ISO 200 HDR Tonemapped image


Wikipedia article about the battle and the chapel

* Book description from this website.

The book is also available from Amazon 

As ever. Thanks for taking the time to visit and if you have any questions then please doon't hesitate to get in touch.

Tom

Sunday, 27 November 2016

Always use protection. . .

In my courses, I always stress the importance of using a filter on the front of your lens.

I am not talking about polarisers, grads or ND filters here. A simple skylight, UV, haze or protection filter is good enough.

Every couple of weeks a post pops up in my Facebook thread about whether or not to use one. The opponents argue that lens manufacturers go to great lengths to ensure that their products are optically perfect and putting another piece of glass at the front will degrade the quality. The proponents argue that with a good quality filter, you will not notice the difference and will be afforded another level of protection.

I am (and always have been) an advocate of using a filter to protect the lens for a couple of reasons. Firstly, I never use lens caps and the filter protects the front element when in my bag and when carrying it around. Secondly, I would rather wipe any dirt or water from the filter than risk smearing or scratching the front element. Thirdly, if the camera slips off your shoulder or is knocked against a hard surface, the filter will take the brunt of the damage as mine did last Tuesday. 
3m x 3m Enlargements with UV filter

Fujifilm x100 and filter damage

Fujifilm x100 and filter damage


I returned from a photography class and had my Fujifilm x100 on my shoulder. The camera simply slid off my shoulder and fell lens first onto a marble floor. The only damage was to the filter. This was soon replaced and nothing major happened to prevent me continuing to shoot, nor did my camera have to be sent away to be fixed*.

I have always had a skylight, UV, haze or protection filter on the front of my glass. I do make sure though, that it is of good quality. How do I do this? I simply buy a well known brand (Tiffen, BW, Hoya etc)  if I don't know the brand, I will simply take a couple of pictures at varying apertures with and without the filter. They will then be enlarged to 100% to check if there are any glaring differences between them.


The picture on the wall behind me on the picture above was taken with a Canon EF 50mm f1.4 lens fitted with a Hoya skylight filter. I defy anyone to tell me that the quality would be better without a filter. the enlargements are three meters by three meters!

So my conclusion is to use protection in the form of a clear filter on the front of your lenses.

Thanks for reading.

* To add insult to injury, the lens hood which would also have protected my lens, fell off, unknown to me, on the way to the photo class!

Sunday, 24 July 2016

Revisiting the Zenit-E

Early on in this blog, I wrote about how I got started in photography. This was the camera that started it all for me. The venerable Zenit E.
 

I recently got one to add to my home collection. Looking at it after 37 years, I am surprised that it didn't turn me off for life!

There are five shutter speeds. 1/30th to 1/500 sec and the exposure is measured with a match needle metering system on the top plate. The image had to be viewed through an f3.5 lens with a very dim viewfinder. Then you had to stop the lens down to the appropriate aperture before pressing the shutter button.

 Here's the top plate. ISO 16 - 500. A frame counter that had to be reset after each roll of film. MF or X flash synchronisation and an accessory shoe (not a hotshoe).

 
The whole experience somehow fired my imagination and set me on this photograph journey.


I guess that the moral of this post (if there to be one) is that no matter how daunting your first camera seems to you, it could be a whole lot more difficult.

What was your first camera experience like?

Thanks for reading.


Wednesday, 30 March 2016

A shoot shooting shooting stuff!

An interesting opportunity recently presented itself.


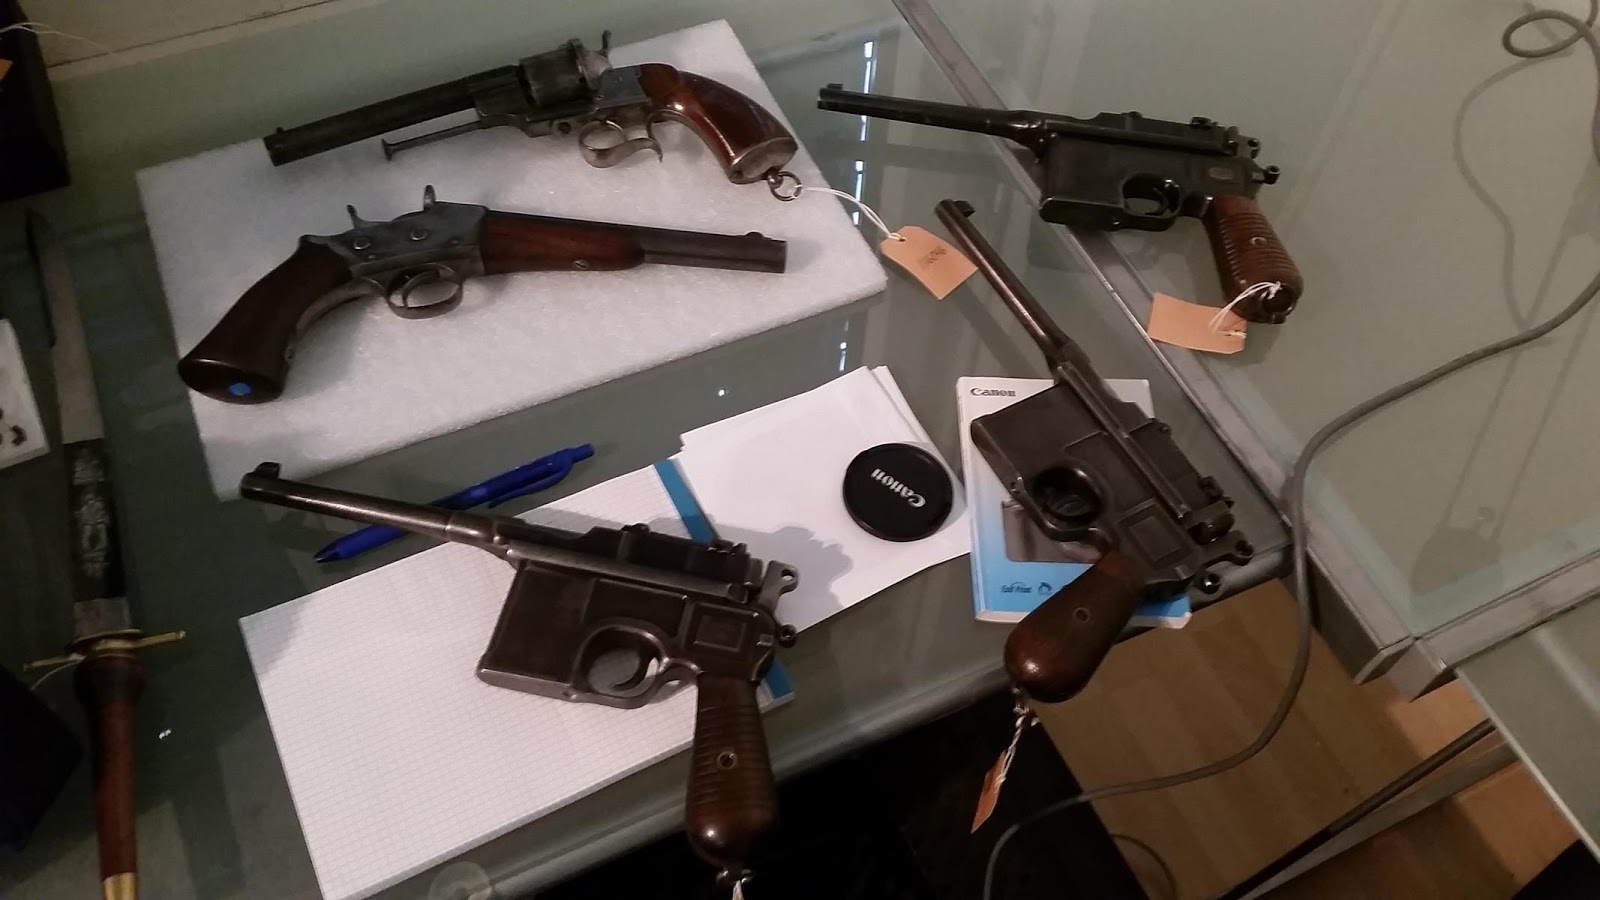
A friend of mine who has a gun dealership asked my advice on taking product shots for a catalogue to be used at one of his upcoming auctions.

   Some of the 600 or so weapons to be photographed and auctioned.

He had photographed previous auctions using a small point and shoot compact but was dismayed at the inconsistency of the results.

I discovered that he had an old Canon EOS 400d and we decided to use that for the shoot together with its 18-55 f3.5 - 5.6II kit lens. however, he was so enamoured of my demonstration of the EOS Utility programme (which comes with all canon raw capable cameras) where the camera can be tethered to a computer, that he went out and bought an EOS 70d.

My plan when doing product photography is always as follows:

1:     If the products are on a wall or lying flat on a table, make sure that the camera is perpendicular to the subject. I use a simple spirit level on the subject and on the camera. At first I was using a small spirit level on the back of the 70d until I read the instruction manual during a coffee break that it had a built in electronic level! 

Before discovering the electronic level!

2:     Make sure that the basic lighting is consistent if you are looking for even illumination. That means take a light meter reading from different parts of the area to be photographed to make sure that there are no darker or lighter areas that your eyes might not register. For this shoot, my friend was using constant lighting so we could gauge visually where any inconsistencies might be.

3:     When you have determined the correct exposure, use that for the whole shoot as long as the light is consistent.

Quick, simple and effective

4:     Close the windows and draw the curtains (or blinds). If daylight is streaming into the room, it will show on the images as it gets progressively stronger and weaker throughout the day. the only light hitting your subject should be the stuff that YOU are supplying.

5:     Use a "standard" lens. This is a lens that equates roughly to the same angle of view that your eyes see (46 degrees). With a full frame camera this is the so called nifty fifty.With a Canon APS sensor camera it would be a 30mm. I use this so that no distortion is introduced into the image.

6:     Start with the biggest items first. As the items get smaller, you move the camera nearer. You DON'T zoom in!. If the lighting is consistent, you won't have to change anything except the focus as you are moving nearer.

Once you have observed and used the above methods, you will find that it goes really fast. in our case, my friend had one person taking out the weapons, another laying them down, another taking a picture using the infra-red release (to keep camera shake to a minimum.) and a fourth person cataloguing everything as it was shot.

 Workflow

Don't forget to take a few safety precautions. As our camera was balanced precariously at the end of a tripod extension arm, we used a carrier bag of ammunition to counter it!


 Who needs expensive ballast bags?


Tripping over cables should 
also be avoided.


 Guns everywhere

 Here are a few "behind the scenes" images taken during the shoot.


Thanks to an organised and motivated team, we were able to churn our way through nearly 600 rifles, pistols, machine guns, grenades, muskets, flintlocks, rocket launchers (yes really) and assorted paraphernalia in two and a half days.

Here are a couple of the first results.


The auction which will be available internationally will be held here in Switzerland at the end of April. You can get a catalogue and find out more by visiting the Swiss Tactical Center website.

I hope you enjoyed reading this. If you have any comments, please leave them in the box below.

Tom