Wednesday 1 July 2015

Say hello to my little friend . . .

I never buy cameras when they first come out. 

I bought my current EOS 5D MKII just after the Mark 3 was introduced. This has the benefit of being "field tested" by thousands of users and being able to read their opinions. It also means that dealers will want to clear their shelves to make way for the latest model.

By the time I buy a new piece of kit, I will have read everything I can about it and therefore will be able to make an informed buying decision.

I saw my latest acquisition when it first came out in 2010 and immediately wanted it! It looked good and reminded me of my early eager years in photography. A time when not too many folks had zoom lenses and there were parallax correction indicators in the viewfinder.

I'm talking about the Fujifilm X100 range finder camera. 'Tis a thing of beauty and a joy to behold. 

I'm not going to do an in depth test here as there are plenty of other people doing that all over the 'net


What I will do however is to write about why I love this little "old" camera. Firstly, as I mentioned at the beginning it reminds me of my youth. It reminds me of when I was learning photography with an old Halina Paulette Electric camera. The X100 is like a supercharged version of that camera.

The day I received the camera (which I got for a very good price from an auction website), I spent just looking at it! It really is a joy to look at and feels good. All the controls fall easily to hand and anything that you set manually on the body can be seen in the very informative viewfinder window.

It has three auto modes. If you want shutter priority, you set the lens aperture dial to A. If you want aperture priority then the shutter speed dial must be set to A. For fully programmed, you have to set both the aperture and the shutter speed dials to A. For fully manual just pick and choose your own aperture and speed. The viewfinder will tell you how far off you are with a plus / minus bar on the left.


The camera is fitted with the 35mm full frame equivalent of a 35mm semi wide angle lens. No zooming here. You either stick to landscapes, groups or get in close! If you have read my blog in any depth or you know me personally, you will be aware that I dislike lens caps! I just don't like them. The first thing I wanted to do with the camera was to hide the lens cap away but that left the front element of the lens exposed. There is no filter ring on the lens so you have to buy an adapter ring.

The price of original Fujifilm accessories is, in my opinion, extortionate so I bought a JJC filter ring adaptor together with a clone lens hood for about Fr 20 ($21 or £13). Fuji want $70 for the equivalent.

I found the 35mm angle of view to be a bit restricting when I was out hiking so I invested in a screw on lens which converts it to a 28mm. The optical results are good enough for me and my clients. The hood is deep enough to keep anything from making contact with the lens.


 The JJC cloned lens hood

 The JJC cloned lens hood with the wide angle adapter

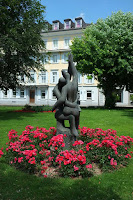
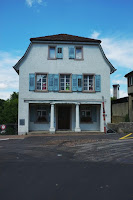
Here are a few snaps I took whilst walking around Rheinfelden, a charming town on the border between Germany and Switzerland. They are all straight from the camera.


This is a "direct from camera" panorama image

As mentioned earlier, there are lots of reviews for the camera on the 'net. I just wanted to write about how happy I am with it. It looks good, feels great in the hand and turns out more than adequate results. The only two minor niggles I have with this piece of kit are the RAW conversion software which I find clunky and cumbersome and the exposure compensation dial which sometimes gets inadvertently moved when the camera is slung over my shoulder.

All in all, it's a great piece of kit that puts the fun back into photography.


I take mine everywhere.

Thanks for reading.


Wednesday 6 May 2015

Sorry. That's too big.

I recently visited the Gauguin exhibition at the Beyeler Foundation just outside of Basel with an art loving friend.


Beyeler Foundation

As it was my first time at a major exhibition, I decided to take a serious camera with me and not rely on snaps from my capable mobile phone because I wanted to have some of the resulting images printed out in postcard size as a memento for my friend and thought that I would probably need to crop or zoom in if there were too many people there.

I chose my EOS 5d MKII together with the 24 - 105 zoom and a Speedlite 430 EXII.


Not acceptable

It was a beautiful day when we arrived and the waiting queue of people was not that long. The exhibition has been extensively advertised as a "blockbuster" type of event and has tried to capture public attention by its use of high-tech guides and even bringing in Hollywood star Keanu Reeves to open it!


After a short wait of only about five or six minutes, we reached the cloakroom and left our jackets there.

"You'll have to leave your camera behind." One of the attendants told me.
"Why?" I asked.
"That's the rule here" was his response

Reluctantly I handed over the camera and made my way through the next checkpoint.

The art gallery makes fantastic use of natural and artificial illumination. Lovely shadowless light that you normally experience on a cloudy but bright day. I looked around to take it all in and realised that THERE WERE LOADS OF PEOPLE TAKING PICTURES!

There were mobile phone cameras, bridge cameras, compacts, video cameras and even Tablet devices merrily snapping away.

I decided to join them and reached inside my coat pocket for my mobile phone only to discover that I had left in in my car. The car of course was too far away for me to go back to and I didn't fancy waiting amongst the people waiting at the entrance, which was growing longer by the minute, to get back in.

I really wanted to take some pictures for my friend so I approached one of the employees. We had a conversation something like this:

"Excuse me. I see that there are lots of people taking pictures here. Is that allowed?"

"Yes" he replied "But if there is a sign next to the painting forbidding it, then obviously we ask that it not be photographed"

"I tried to bring my camera in but they wouldn't let me". I said.

"Is it a big camera? Was his response?

"It is large in size. Yes"

"Then that is not allowed"

"But some of the people in here have cameras with perhaps better resolution than mine" I argued

"Big cameras are not allowed" was his reply.

"How about if I make it smaller?" I asked.

"That would be permissible" Said the guard.

"Great. Thanks", I replied. An idea forming in my head.

I made my way through the swelling throng of visitors back to the cloakroom and retrieved my camera from the attendant. To make my camera "acceptable", I simply removed the battery grip and the Speedlite.


Acceptable for exhibitions

As I mentioned previously, the lighting inside the Beyeler art gallery is ideal for photography. I took a spot meter reading of the palm of my hand and used the resulting reading, 1/50th @5.6 with ISO 800 for all the shots taken in the place. Such was the lighting consistency that I didn't need to change anything.
 

"Polynesian woman with children" (1901)

 Riders on the beach (II) (1902)


 Visitors inspecting Gaugin's largest piece of work.
"Where do we come from? What  are we? Where are we going?" (1897/98)

So if you are thinking of attending the Gauguin exhibition in Basel please be assured that you can take pictures but only with a compact, tablet device, video camera or mobile phone. if you want to use your (D)SLR, then try and make it as small as possible.

You can read more about the exhibition here.

P.S. As I have mentioned before on this blog, I am a bit of a philistine when it comes to art. 

As ever. Thanks for reading.

Thursday 5 March 2015

Learn tips and techniques part 1

So you've just bought a wonderful super specified SLR and want to do more than just take "happy snaps"?

Maybe you want to explore what your new camera is capable of?

What do all those settings on the command dial mean? What do they do exactly?

If you register for one of my classes, I will show you in simple terms exactly how to get the most out of your new (or even old) equipment.


 Learn simple but effective ways to alter flash images

What else can you do? The possibilities are only limited by your imagination. Even the simplest of cameras can produce jaw dropping images. As long as you have some  control over your camera settings, whether its a compact or a high end DSLR, the end results can be rewarding.
Learn how to control speed & movemenrt
 As well as group sessions, I also offer one to one coaching for people who lack the time to attend regular classes. Give me a call today and find out how to take your photography to a new level.

Contact me today for more information.

Thanks for reading.


Wednesday 18 February 2015

Lens focal lengths from 16mm fish eye up to 420mm telephoto

On a fine Summer's day last year in my village, I decided to see what the range of every lens in my collection was. I took a picture with each one and combined them into this 50 second clip. . .

At the start, I used my EOS 5D MKII and the Russian Zenitar 16mm fish eye. After the 300 mm  I switched to my EOS 7D to make use of the crop factor which gave me an effective 420 mm focal length.


Since doing this test, I have sold my old 300mm and my 70 - 200 zoom. They've been replaced by the Canon EF 100 - 400L  zoom so I may have to repeat it again!

Thanks for reading.

Thursday 12 February 2015

Fotografie Kurse für 2015

Die Planungen sind nun komplett. Wie manche von Euch wissen, gebe ich regelmässig Fotografie und ähnliche solche Kurse für die Migros Klubschule hier in der Schweiz. Kurse wie Anfängerfotografie, Portrait Workshops, Strassenfotografie und auch das Designen eines Photobooks.

Ich gebe auch meine eigenen Kurse in Klassen, oder auch Eins zu Eins, mit Leuten die das wünschen. Manchmal bekomme ich einen spezifischen Wunsch für einen Kurs, zum Beispiel von Leuten die eine neue DSLR Kamera kauften und nicht wussten, welche Einstellungen zu gebrauchen.


Jeder Kurs ist an den Interessenten angepasst, nachdem wir zusammen erkundeten, was genau er braucht. Sie lernen simple Techniken, wie zum Beispiel, wie man den Hintergrund verdunkelt für Blitzlicht Fotografie.


Eine simple Technik, um den Hintergrund zu verdunkeln

Natürlich geht das auch umgekehrt. Man kann auch den Hintergrund progressiv erhellen.


Ich zeige den Interessenten simple Techniken, wie diese.
 
Ein weiterer Bereich, den ich lehre ist das Zubehör. Was brauchst Du wirklich, neben der eigentlichen Kamera, Linse und Blitzlicht? Dieser Kurs hilft den Interessenten sehr dabei sich zu entscheiden, was sie mitnehmen sollen oder nicht, oder auch was sie überhaupt zu Beginn kaufen sollen.

Filter werden auch diskutiert. Welche (wenn überhaupt welche) sind empfohlen? Ich gebe dazu meine Meinung und wir diskutieren.

 
Der vorher-nachher Effekt eines polarisierenden Filters


Natürlich ist kein guter Kurs komplett, ohne das Fotografieren selbst! Dies ist ein grosser Teil des Kurses und ich bin immer da für Motivation und Feedback. Danach besprechen wir alles mit Tee oder Kaffee.

Der letzte Teil meines Kurses betrifft normalerweise Software und auch wieso ich es empfehle, Bilder im RAW Format zu schiessen.


 Lerne wie Du unterbeleuchtete Bilder rettest mit dem RAW Format 

 . . .oder sogar wie du nerfige Farbenstiche änderst

Die Kurse dauern entweder einige Stunden für diejenigen, die nur etwas Neues dazulernen möchten, oder es sind drei wöchige Anfängerkurse für die Neufotografen.

Egal wieviel Erfahrung, es gibt immer etwas von Interesse für Dich.

Mehr Informationen gibt es hier und ich bin immer für Fragen erhältlich

Danke fürs Lesen.

Monday 9 February 2015

Photography courses for 2015

The planning is now complete. As some of you may be aware, I give regular photography related courses for the Klubschule Migros here in Switzerland. Courses include beginners photography, portrait workshops, street photography and even designing a photo book.

What I also do is run my own classes either in groups or on a one to one basis. 

Sometimes I get a specific request for perhaps someone who has just purchased their first DSLR and wants to get up to speed on how it works and what settings to use. Every course is tailored to the pupil after finding out exactly what he or she wants to know.

My students learn simple (but often misunderstood) techniques such as how to darken the background in flash photography.


 One simple technique to darken the background


Of course it works the other way too. You can make a background progressively lighter.

 My students learn simple techniques such as this


Another area we cover is accessories. What for example do you really need apart from a camera, lens and flash? This is a popular part of the course and helps the student decide exactly what they should take with them and what to leave behind (or not even purchase in the first place). 

Filters are also discussed. What (if any) are recommended? I give my opinion and we discuss.

 The before and after effect when using a polarising filter


Of course, no self respecting session would be complete without us actually going out and taking pictures. This is a large part of the course and I am always on hand to give encouragement and feedback. Afterwards we'll discuss everything over tea or coffee.

The final part of my course usually deals with software and in particular why I recommend shooting in RAW format.


 Learn how to rescue underexposed images using RAW

 . . .or even change an annoying colour cast

The courses can last from a couple of hours, for those of you who wish to maybe brush up on a particular technique, to the three week beginners course for the total beginner. 

Whatever your level of expertise, there will be something of interest for you.

You can find out more here. At the moment the site is in German but I am available for any questions you may have.

Thanks for reading.


Friday 23 January 2015

A couple session

I received a message last week from a model friend with whom I had lost contact with. Steffi had moved away from the area but was now back in my neighbourhood and made contact with me.

We talked a while and it was suggested that I take some updated photos for her portfolio. I was happy to do so and duly turned up at their house a day or so later. 

It was freezing cold and very overcast outside but thankfully her and her partner's apartment was lovely and warm. After a meal we set to work.

Because it was quite dark with the room lighting, I decided to use my Lightsphere Chinese clone to soften the flash. I attached it to my Speedlite 430 EX II and fired away. I really enjoy using my Lightsphere clone. The effect it has on the flash output is quite dramatic and turns what would normally be harsh shadows into soft pleasing romantic light.      


My Lightsphere copy on the table and at work

After moving some tables and chairs to make some space, we began the shoot.


The images above were all taken with the 24 - 105 using flash and the lightsphere clone. The ISO was 400.

After the sitting room, we went to the bedroom to get some photos of Steffi and her partner Marc as a couple. I wanted a light airy "feel" to the images so I mounted my two Speedlites on tripods and bounced them off the ceiling. The flash output was set to overexpose by one stop. To add to the "light and airy" mood, we took the duvet covers off. To trigger them, I used Phottix Odin transmitter and receivers. The Phottix Odins are simply fantastic to use and haven't ever let me down. They are way cheaper than Pocket Wizards and are more versatile.


I told Steffi and Marc to ignore me and just interact with each other. Their two cats joining us from time to time, helped produce some very pleasing images.


 One of the few images without flash


All the images above were taken with the 50 1.4.

Marc was also kind enough to take some images of me "at work".


Although, as usual, I took too much gear with me, I ended up only using my EOS 5D MKII, the 24 - 105 zoom and the 50mm 1.4. Still. It's better to take too much gear and not need it than to take just a few items and find that you miss something. 

Steffi is a real professional and a pleasure to work with. Nothing is too much trouble for her. If you'd like to see her online portfolio, you can use this link (German).

That's it for now. Thanks for reading and please feel free to leave some comments below.